Red velvet cake is more than just a dessert—it’s an experience. With its striking deep-red color, velvety crumb, and luscious cream cheese frosting, this cake has captured the hearts of bakers and dessert lovers across the United States, the United Kingdom, and Canada. Whether you’re preparing for a birthday, Valentine’s Day, or simply indulging in a weekend bake, learning how to perfect red velvet cake can take your baking skills to the next level.
In this article, we’ll uncover the best tips for Red velvet cake recipe! From understanding its unique flavor to mastering baking techniques, you’ll find everything you need to create a showstopping cake every single time.
What Makes Red Velvet Cake Unique?
Before diving into the practical steps, it’s essential to understand why red velvet cake stands apart from other cakes.
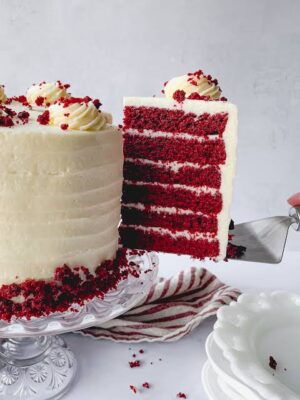
Texture: Unlike dense chocolate cakes, red velvet is light, moist, and tender, thanks to the combination of buttermilk and vinegar.
Flavor: It offers a subtle cocoa taste balanced with tanginess from cream cheese frosting.
Appearance: Its iconic red hue adds a dramatic flair, making it perfect for special occasions.
When you set out to uncover the best tips for Red velvet cake recipe, keep in mind that it’s about balancing flavor, texture, and visual appeal.
Essential Ingredients for the Perfect Red Velvet Cake
Core Ingredients
To get started, you’ll need these basics:
All-purpose flour – the foundation for structure
Cocoa powder – just a touch for mild chocolate flavor
Buttermilk – for tang and softness
Vinegar – helps react with baking soda for a tender crumb
Sugar – for sweetness and balance
Butter and oil – for flavor and moisture
Eggs – to bind the batter
Red food coloring – the signature element
Frosting Must-Haves
Cream cheese
Butter
Powdered sugar
Vanilla extract
Together, these create the luxurious frosting that red velvet cake is famous for.
Step-by-Step: Baking Red Velvet Cake
Step 1: Prepare the Ingredients
Preheat the oven to 350°F (175°C). Grease and flour two 9-inch round cake pans. Allow ingredients like butter, eggs, and cream cheese to come to room temperature for smoother mixing.
Step 2: Mix the Dry Ingredients
In a medium bowl, whisk together flour, cocoa powder, baking soda, and salt. This ensures even distribution and prevents clumps.
Step 3: Cream the Butter and Sugar
Beat butter and sugar until light and fluffy. Add the oil for extra moisture, followed by eggs one at a time. Incorporate vanilla extract.
Step 4: Add the Red Hue
Mix in red food coloring and vinegar. This is where the cake gets its iconic color and tender texture.
Step 5: Alternate Wet and Dry
Gradually add the dry ingredients, alternating with buttermilk, beginning and ending with flour. Avoid overmixing to prevent toughness.
Step 6: Bake and Cool
Divide the batter into the pans and bake for 25–30 minutes. Cool completely before frosting to avoid melting.
Step 7: Frost Generously
Spread cream cheese frosting between layers and around the cake for a smooth finish.
By following these steps, you’re well on your way to uncover the best tips for Red velvet cake recipe!
Practical Tips for the Best Red Velvet Cake
Here are some game-changing tips to elevate your baking:
1. Use Gel Food Coloring
Liquid coloring can thin out your batter. Gel food coloring delivers a vibrant red hue without affecting texture.
2. Don’t Skip the Vinegar
It may sound unusual, but vinegar plays a crucial role in activating baking soda, ensuring a light and airy cake.
3. Weigh Your Ingredients
Accuracy is key for baking success. Using a kitchen scale ensures the perfect balance of flour, sugar, and cocoa.
4. Chill Before Frosting
Refrigerate the cake layers for at least 30 minutes before frosting. This prevents crumbs from mixing into the frosting.
5. Add a Crumb Coat
Apply a thin layer of frosting first, chill it, and then finish with a thicker coat. This results in a smooth, professional finish.
Variations to Try
Cupcakes
Turn this recipe into bite-sized treats by baking in cupcake liners for 18–20 minutes.
Layered Red Velvet Cheesecake
Add a cheesecake layer between cake layers for an indulgent twist.
Gluten-Free Option
Swap all-purpose flour with a 1:1 gluten-free baking flour blend.
Common Mistakes to Avoid
Even experienced bakers can run into issues. Here are pitfalls to watch out for:
Overmixing the batter: This leads to dense, chewy cake.
Too much cocoa: Red velvet should have just a hint of cocoa flavor, not overpowering chocolate.
Skipping buttermilk: It’s essential for the tangy flavor and soft crumb.
Using cold ingredients: Cold butter or eggs can cause uneven mixing.
By avoiding these, you’ll truly uncover the best tips for Red velvet cake recipe!
Storing Your Red Velvet Cake
Room Temperature: Store in an airtight container for up to 2 days.
Refrigerator: Keeps fresh for up to 5 days. Allow to come to room temperature before serving.
Freezer: Wrap unfrosted cake layers tightly and freeze for up to 2 months. Thaw before frosting.
Conclusion: Uncover the Best Tips for Red Velvet Cake Recipe!
Red velvet cake is a classic dessert that never fails to impress. From its velvety texture and rich flavor to its dramatic appearance, it’s a cake that delivers on all fronts. By following the steps outlined here, avoiding common mistakes, and incorporating practical tips, you can master the art of baking this iconic cake.
Whether you’re baking for family, friends, or a special celebration, remember that practice makes perfect. So roll up your sleeves, gather your ingredients, and uncover the best tips for Red velvet cake recipe! The end result will be a stunning, delicious cake that everyone will love.