Paper mache is one of those timeless crafts that never goes out of style. Simple, affordable, and incredibly versatile, it’s loved by parents, teachers, artists, and DIY enthusiasts alike. Whether you’re creating school projects, home décor, party props, or art sculptures, learning the right techniques can make all the difference. That’s why this guide is dedicated to **Uncover the best tips for paper mache recipe!**—so you can achieve strong, smooth, and long-lasting results every time.
This article is designed for readers in the United States, the United Kingdom, and Canada, with easy-to-follow steps, practical advice, and proven methods suitable for beginners and experienced crafters.
—
## **Introduction: Why Paper Mache Is Still a Favorite Craft**
Paper mache (also spelled papier-mâché) has been used for centuries to create everything from masks and bowls to theatrical props and decorative art. The beauty of this craft lies in its simplicity: paper, adhesive, and a little creativity.
When done correctly, paper mache is lightweight yet sturdy, eco-friendly, and budget-friendly. However, many beginners struggle with common issues like soggy results, cracking, or weak structures. This is exactly why it’s important to **uncover the best tips for paper mache recipe!** and understand how small adjustments can lead to professional-looking results.
—
## **H2: What Is Paper Mache? A Quick Overview**
Paper mache is a crafting technique that involves layering paper soaked in a paste or glue mixture over a mold or structure. Once dry, it hardens into a solid form that can be painted and decorated.
### **H3: Common Uses of Paper Mache**
* School art projects
* DIY bowls and trays
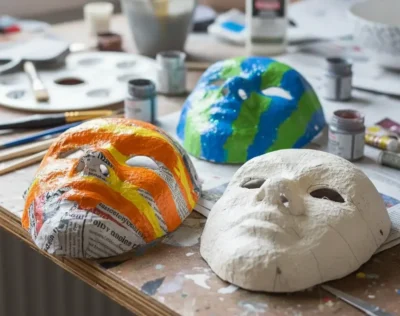
* Masks and costumes
* Holiday decorations
* Sculptures and props
Its flexibility makes it suitable for all ages and skill levels.
—
## **H2: Essential Ingredients for a Paper Mache Recipe**
Before diving into techniques, let’s start with the basics.
### **H3: Paper Options**
* Newspaper (most common and affordable)
* Tissue paper (for smooth finishes)
* Paper towels (adds strength)
Tear paper into strips rather than cutting—it helps the edges blend better.
### **H3: Adhesive Choices**
There are two popular paper mache paste options:
* **Flour and water paste** (traditional and kid-friendly)
* **Glue-based paste** (stronger and more durable)
Both work well, depending on your project.
—
## **H2: Classic Paper Mache Paste Recipes**
### **H3: Flour and Water Paste**
This is the most common beginner-friendly option.
**Ingredients:**
* 1 cup all-purpose flour
* 1–1¼ cups water
**Instructions:**
Mix until smooth, with a consistency similar to pancake batter. Remove lumps for a cleaner finish.
### **H3: Glue-Based Paste**
Ideal for stronger projects.
**Ingredients:**
* White school glue (PVA glue)
* Water (1:1 ratio)
This version dries harder and is preferred for decorative or long-term projects.
—
## **H2: Step-by-Step Process to Make Paper Mache**
Understanding the process is key to **uncover the best tips for paper mache recipe!**
### **H3: Step 1 – Prepare the Base**
Use balloons, cardboard forms, plastic containers, or wire frames as molds. Cover them lightly with oil or plastic wrap if you want easy removal.
### **H3: Step 2 – Dip and Layer**
Dip paper strips into paste, remove excess, and smooth them onto the surface. Overlapping strips improves strength.
### **H3: Step 3 – Build Layers**
Apply 3–5 layers for light projects and up to 8 layers for stronger structures. Let layers partially dry between applications.
### **H3: Step 4 – Dry Completely**
Allow the project to dry fully—this can take 24–48 hours depending on humidity.
—
## **H2: Common Paper Mache Mistakes (and How to Avoid Them)**
### **H3: Too Much Paste**
Over-saturated paper leads to soggy results. Always squeeze off excess paste.
### **H3: Not Enough Drying Time**
Rushing causes mold and weak structures. Patience is essential.
### **H3: Uneven Layers**
Smooth each strip with your fingers to prevent bubbles and wrinkles.
—
## **H2: Practical Tips to Improve Your Paper Mache Results**
This is where you truly **uncover the best tips for paper mache recipe!**
* Use thin layers for faster drying
* Work in a warm, well-ventilated area
* Rotate your project while drying
* Add a final layer of tissue paper for smoothness
* Sand lightly once dry for a polished finish
These small habits dramatically improve final results.
—
## **H2: How to Make Paper Mache Stronger and Long-Lasting**
### **H3: Reinforce with Cardboard**
Insert cardboard shapes between layers for added stability.
### **H3: Seal the Surface**
Once dry, seal with:
* Acrylic sealer
* Mod Podge
* Clear varnish
This protects against moisture and cracking.
—
## **H2: Painting and Decorating Paper Mache**
### **H3: Best Paints to Use**
* Acrylic paint (best choice)
* Poster paint (for kids’ projects)
Always apply a base coat of white paint or gesso for vibrant colors.
### **H3: Decorative Finishes**
* Glitter
* Decoupage
* Fabric accents
* Metallic paints
Paper mache becomes truly eye-catching with creative finishing touches.
—
## **H2: Safe and Kid-Friendly Paper Mache Tips**
For classrooms and family projects:
* Use flour-based paste
* Supervise young children
* Avoid raw paste storage (make fresh each time)
* Clean hands and surfaces promptly
Paper mache is an excellent hands-on learning activity when done safely.
—
## **H2: Eco-Friendly Benefits of Paper Mache Crafting**
One of the biggest advantages of paper mache is sustainability. It reuses paper waste, requires minimal supplies, and avoids plastics. Choosing this craft supports eco-conscious creativity, especially popular in the US, UK, and Canada.
—
## **Conclusion: Master the Art with Confidence**
Paper mache is simple—but mastering it takes a bit of know-how. By following the techniques and advice in this guide, you can confidently create durable, beautiful projects without frustration. From choosing the right paper and paste to drying, sealing, and decorating, you now truly **uncover the best tips for paper mache recipe!**
Whether you’re crafting with kids, decorating your home, o
r exploring artistic expression, paper mache offers endless possibilities. With patience, creativity, and these proven tips, your next project is guaranteed to be a success.
Happy crafting! 🎨📄