
Baking gluten-free bread at home can feel intimidating. Many people try once, end up with a loaf that’s dry, crumbly, or dense, and decide gluten-free baking just isn’t worth the effort. The truth is, gluten-free bread can be soft, flavorful, and satisfying—you just need the right techniques.
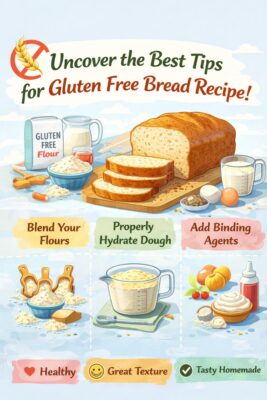
If you’re ready to improve your results, it’s time to uncover the best tips for a gluten-free bread recipe that actually works. Whether you’re baking due to celiac disease, gluten sensitivity, or personal preference, this guide will help you understand ingredients, methods, and expert tricks used by successful gluten-free bakers across the United States, United Kingdom, and Canada.
Why Gluten-Free Bread Is Different
Traditional bread relies on gluten to provide structure, elasticity, and chew. Gluten-free bread must recreate those qualities without wheat, barley, or rye.
Key Challenges in Gluten-Free Baking
Lack of elasticity and stretch
Crumbly or dry texture
Poor rise or dense crumb
Short shelf life
Once you understand these challenges, it becomes much easier to overcome them.
Choosing the Right Gluten-Free Flour Blend
Use a Blend, Not a Single Flour
One of the most important steps to uncover the best tips for a gluten-free bread recipe is understanding flour blends.
Gluten-free bread works best when multiple flours are combined to balance flavor, structure, and moisture.
Common Gluten-Free Flours
Rice flour (white or brown)
Sorghum flour
Oat flour (certified gluten-free)
Tapioca starch
Potato starch
Pro Tip: Use a high-quality store-bought gluten-free all-purpose flour that includes starches and already has a balanced ratio. This saves time and improves consistency.
Don’t Skip the Binder (It’s Essential!)
Since gluten is absent, binders are critical for structure.
Best Gluten-Free Binders
Xanthan gum
Guar gum
Psyllium husk powder
Psyllium husk is especially popular in the UK and Canada for artisan-style gluten-free bread because it creates a chewy, elastic texture similar to wheat bread.
Typical ratio:
1 teaspoon xanthan gum per cup of gluten-free flour
Too much binder can make bread gummy, so measure carefully.
Hydration Is the Secret Weapon
Gluten-Free Dough Is More Like Batter
Unlike traditional bread dough, gluten-free bread dough is usually wetter and closer to a thick batter. This is normal—and necessary.
If your dough looks sticky, you’re probably doing it right.
Tips for Proper Hydration
Use more liquid than wheat bread recipes
Let the dough rest (15–30 minutes) before baking
Avoid adding extra flour to “dry it out”
Hydration activates binders and improves crumb texture.
Yeast Tips for Better Rise
Yeast behaves differently in gluten-free dough, but it still needs the right environment.
Yeast Best Practices
Use instant or active dry yeast (check expiration date)
Liquids should be warm, not hot (105–110°F / 40–43°C)
Add a small amount of sugar or honey to feed the yeast
Let dough rise only once (over-proofing causes collapse)
Shorter rise times often produce better gluten-free bread.
Mixing and Kneading: Less Is More
Traditional kneading develops gluten—something gluten-free dough doesn’t need.
Proper Mixing Technique
Mix until fully combined and smooth
No kneading required
Use a stand mixer or spoon for even hydration
Over-mixing can break down structure, so stop once the dough looks uniform.
Baking Tips for Perfect Gluten-Free Bread
Choose the Right Pan
Gluten-free bread benefits from support while baking.
Use loaf pans with straight sides
Metal pans provide better heat distribution
Grease pans well or use parchment paper
Oven Temperature Matters
Bake gluten-free bread slightly longer at a moderate temperature.
Ideal range: 350–375°F (175–190°C)
Internal temperature should reach 205–210°F (96–99°C)
This ensures the center is fully baked.
Cooling Is Part of the Process
This step is often overlooked.
Why Cooling Matters
Gluten-free bread continues to set as it cools. Cutting too early can cause gumminess or collapse.
Best practice:
Cool in the pan for 10–15 minutes
Transfer to a wire rack
Wait at least 1 hour before slicing
Patience makes a huge difference.
Common Gluten-Free Bread Mistakes to Avoid
Adding too much flour
Skipping binders
Under-hydrating the dough
Over-proofing yeast
Slicing while hot
Avoiding these errors is key when you uncover the best tips for a gluten-free bread recipe.
How to Improve Flavor in Gluten-Free Bread
Gluten-free flours can taste bland without enhancement.
Flavor-Boosting Ideas
Add olive oil or butter
Use apple cider vinegar or lemon juice (improves rise too)
Add seeds (sunflower, flax, chia)
Sprinkle herbs or garlic powder
Small additions create bakery-quality results.
Storage Tips for Gluten-Free Bread
Gluten-free bread dries out faster than wheat bread.
Best Storage Methods
Store at room temperature for 1–2 days (wrapped tightly)
Refrigerate only if necessary
Freeze slices individually for long-term storage
To reheat, toast or warm gently in the oven for best texture.
Practical Tips for Consistent Success
Weigh ingredients instead of using cups
Use room-temperature ingredients
Follow recipes exactly before experimenting
Keep notes on what works best
Practice—results improve quickly
Conclusion
Gluten-free bread baking doesn’t have to be frustrating. With the right flour blend, proper hydration, reliable binders, and smart baking techniques, you can create bread that’s soft, flavorful, and satisfying.
Now that you’ve learned how to uncover the best tips for a gluten-free bread recipe, you’re equipped to bake with confidence. Whether you’re making sandwich bread, artisan loaves, or dinner rolls, these principles will help you achieve consistent success—one delicious slice at a time. 🍞✨