Looking for a simple, budget-friendly DIY project that sparks creativity? Paper mâché is the perfect pick! 🌼 Whether you’re making masks, bowls, or school crafts, this classic mixture of paper and paste transforms everyday materials into artistic masterpieces.
With just a few household items, you can learn how to make paper mâché at home — safe for kids, fun for adults, and endlessly versatile. 🧻✂️
Let’s dive into this easy paper mâché recipe and discover how to craft something amazing today!
🧾 Ingredients for Paper Mâché Paste
You’ll need:
1 cup all-purpose flour
1 cup water (plus more as needed)
1 tablespoon salt (optional, helps prevent mold)
💡 Tip: For a smoother paste, sift your flour first to remove any lumps.
🪣 How to Make the Paper Mâché Paste
Step 1: Mix the Ingredients
In a medium bowl, combine 1 cup flour with 1 cup water. Stir well until smooth — no lumps!
If the paste feels too thick, add a bit more water, one tablespoon at a time. You’re aiming for a thick glue-like consistency — similar to pancake batter. 🥞
Step 2: Add Salt (Optional)
Add 1 tablespoon of salt to your mixture. This helps keep your paper mâché projects from getting moldy, especially if they take several days to dry. 🌤️
Step 3: Tear Your Paper
Tear newspaper, tissue paper, or scrap paper into strips about 1 inch wide. Avoid using scissors — torn edges blend more smoothly when layered.
✂️ Pro Tip: White paper or paper towels work best if you plan to paint your sculpture later.
🖐️ How to Use Paper Mâché Paste
Step 1: Dip and Layer
Dip each paper strip into the paste.
Use your fingers to wipe off excess paste — the strip should be damp but not dripping.
Lay it over your mold or base (like a balloon, cardboard, or bowl).
Step 2: Build Up Layers
Apply 3–4 layers for strength.
Smooth out wrinkles and air bubbles as you go.
Let each layer dry completely before adding the next.
💡 Tip: If you’re short on time, use a fan or hair dryer on low to speed up the drying process.
🎭 Creative Project Ideas
Paper mâché is one of the most versatile crafts ever — perfect for home décor, kids’ projects, and even event decorations!
Here are some fun ideas to try:
🌸 For Beginners:
Paper mâché bowls or vases (use a balloon as a mold)
Animal masks for costume parties
Decorative ornaments for holidays
🎨 For Intermediate Crafters:
Sculptures or figurines
Letter décor for walls or desks
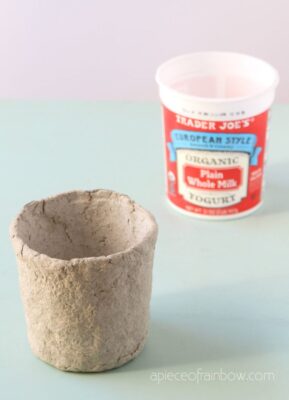
Plant pots or pen holders (line them if using real plants!)
🕊️ For Advanced Artists:
Detailed 3D wall art
Large sculptures for events or school displays
Lampshades made with delicate layering
🌟 Secret Tip: Add a touch of PVA glue or white school glue to your paste for a smoother finish and extra durability!
🎨 How to Paint and Seal Your Project
Once your paper mâché creation is fully dry and firm, it’s time to decorate!
Painting Tips:
Use acrylic paint for bold colors.
Paint a base coat of white first if your paper is dark.
Let the paint dry completely between layers.
Sealing Tips:
Brush on a thin layer of mod podge, PVA glue, or clear acrylic sealer to protect your masterpiece.
This makes it shiny and water-resistant!
🖌️ Creative Touch: Add glitter, tissue layers, or metallic paint for extra flair.
🧼 Cleanup Tips
Paper mâché paste washes off easily with warm water. Clean your tools and table before it dries for a quick, stress-free cleanup!
🚿 Bonus Tip: Line your workspace with newspaper or parchment paper to make cleanup even faster.
Conclusion: Craft Magic in Minutes
Paper mâché proves that creativity doesn’t have to be complicated. With just flour, water, and paper, you can build beautiful, durable creations — from cute décor to impressive art projects. 🎭💫
So grab your materials, roll up your sleeves, and try this paper mâché recipe today! You’ll love how easy and satisfying it is to bring imagination to life — one layer at a time. 🌸🎨