Looking for a creative, affordable craft you can make with items you already have at home? Paper mache is the answer. Whether you’re crafting with kids, making school projects, or creating unique home décor, this guide will show you exactly how to do it. Try this paper mache recipe today and discover how simple, versatile, and satisfying it really is.
Paper mache (also spelled papier-mâché) has been used for centuries to create art, masks, bowls, and sculptures—and it’s still one of the easiest DIY crafts around.
Introduction: Why Paper Mache Is So Popular
Paper mache remains a favorite craft because it is:
Inexpensive and eco-friendly
Made with household ingredients
Safe for kids (with supervision)
Extremely versatile
Perfect for beginners and advanced crafters
With just paper, glue, and water, you can create almost anything.
What Is Paper Mache?
Paper mache is a crafting technique that uses paper soaked in a paste to create strong, lightweight structures once dried. It’s commonly used for:
School art projects
DIY decorations
Masks and piñatas
Sculptures and bowls
When you try this paper mache recipe today, you’ll see how easy it is to get professional-looking results.
H2: Easy Paper Mache Recipe (Classic & Reliable)
Ingredients
1 cup all-purpose flour
1 cup water
Newspaper or scrap paper (torn into strips)
That’s it—no special supplies needed!
H3: Step-by-Step Instructions
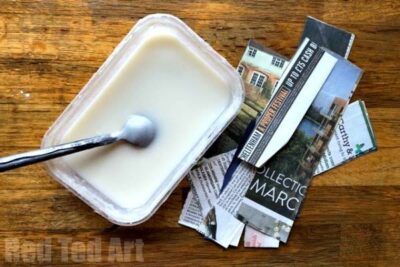
Step 1: Make the Paste
In a bowl, whisk flour and water until smooth and lump-free. The consistency should be similar to pancake batter.
Step 2: Prepare the Paper
Tear paper into strips (tearing works better than cutting for smoother edges).
Step 3: Dip and Apply
Dip each strip into the paste, remove excess with fingers, and apply it to your base (balloon, bowl, cardboard form, etc.).
Step 4: Layer It Up
Apply 3–5 layers for small projects and 6–8 layers for stronger items.
Step 5: Let It Dry
Allow to dry completely (12–24 hours). Once dry, it will be hard and ready to paint.
H2: No-Cook Glue Paper Mache Recipe (Extra Strong)
If you want a quicker option:
Ingredients
White school glue
Water
Instructions
Mix 2 parts glue to 1 part water until smooth. Use the same dipping and layering process.
This version dries stronger and faster, making it ideal for detailed crafts.
H2: What Can You Make with Paper Mache?
When you try this paper mache recipe today, you can create:
Bowls and trays
Masks and costumes
Holiday decorations
Animal sculptures
Pinatas
Wall art
The possibilities are endless.
H2: Practical Tips for Best Results
H3: Make It Stronger
Use more layers
Allow full drying between layers
Use glue-based paste for durability
H3: Drying Tips
Dry in a warm, well-ventilated area
Rotate projects to avoid soft spots
Never paint until fully dry
H3: Painting & Finishing
Use acrylic paints
Seal with clear varnish or Mod Podge
Sand lightly for smoother surfaces
H2: Kid-Friendly Paper Mache Tips
Paper mache is perfect for children with supervision.
Use non-toxic glue
Cover work surfaces
Tear paper ahead of time
Start with balloons or bowls
It’s a great way to build creativity and fine motor skills.
H2: Common Mistakes to Avoid
Using paper towels (too thick)
Applying too much paste
Not allowing enough drying time
Painting before it’s fully dry
Avoiding these ensures success every time.
Why You Should Try This Paper Mache Recipe Today
Paper mache crafting:
Encourages creativity
Recycles paper waste
Costs almost nothing
Works for all skill levels
It’s one of the most rewarding DIY crafts you can do at home.
Conclusion
If you’ve been looking for a simple, creative project, now’s the perfect time to try this paper mache recipe today. With just a few ingredients and a little imagination, you can turn ordinary paper into extraordinary art.
Grab some newspaper, mix up the paste, and start creating—your next masterpiece is waiting 🎨✨