If you’ve ever dreamed of making a rich, silky, bakery-quality chocolate pie at home—this is your moment. This guide will walk you through mastering the art of chocolate pie recipe today, using simple ingredients, clear steps, and foolproof tips. Whether you’re baking for holidays, family gatherings, or pure chocolate therapy, this classic dessert never fails to impress.
Perfect for home bakers across the United States, United Kingdom, and Canada, this chocolate pie recipe is timeless, indulgent, and surprisingly easy.
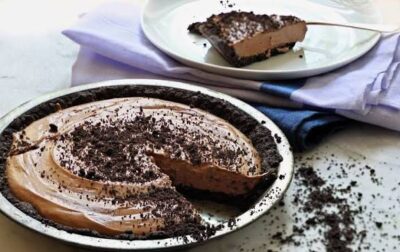
Why This Chocolate Pie Recipe Works
This recipe balances:
Deep chocolate flavor
Creamy, smooth filling
Flaky, buttery crust
No complicated techniques. No fancy equipment. Just reliable results every time.
Ingredients You’ll Need
For the Pie Crust
1 pre-baked 9-inch pie crust (homemade or store-bought)
For the Chocolate Filling
1 cup granulated sugar
¼ cup cornstarch
¼ teaspoon salt
2½ cups whole milk
4 large egg yolks
6 oz semi-sweet chocolate, chopped
2 tablespoons unsalted butter
1 teaspoon vanilla extract
Optional Toppings
Whipped cream
Chocolate shavings
Cocoa powder dusting
How to Make Chocolate Pie (Step by Step)
Step 1: Prepare the Base
If using a homemade crust, blind bake it until golden and fully cooked. Let it cool completely.
Step 2: Mix Dry Ingredients
In a saucepan, whisk together sugar, cornstarch, and salt.
Step 3: Add Milk and Heat
Slowly whisk in the milk. Cook over medium heat, stirring constantly, until the mixture thickens and begins to bubble.
Step 4: Temper the Egg Yolks
Whisk egg yolks in a bowl. Slowly add a small amount of hot mixture to the yolks, whisking continuously. Then return everything to the saucepan.
Step 5: Melt in the Chocolate
Reduce heat to low. Add chopped chocolate and butter, stirring until smooth and glossy. Remove from heat and stir in vanilla.
Step 6: Fill the Crust
Pour the warm chocolate filling into the cooled pie crust. Smooth the top.
Step 7: Chill
Refrigerate for at least 4 hours, or until fully set.
Pro Tips to Master the Art of Chocolate Pie
Stir constantly to prevent lumps or scorching
Use quality chocolate for deeper flavor
Strain the filling for an ultra-smooth texture
Let it chill fully before slicing
These small details make a big difference when you master the art of chocolate pie recipe today.
Chocolate Pie Variations to Try
Chocolate Cream Pie
Fold whipped cream into the cooled filling for a lighter texture.
Dark Chocolate Pie
Use 70% dark chocolate for a richer, less sweet flavor.
No-Bake Chocolate Pie
Use a cookie crust and a chocolate pudding-style filling—perfect for summer.
Common Chocolate Pie Problems (and Fixes)
Runny filling?
→ It needs more chilling time or slightly more cornstarch.
Grainy texture?
→ Heat was too high—always cook gently.
Cracked top?
→ Cover loosely with plastic wrap while chilling.
How to Store Chocolate Pie
Refrigerator: Up to 4 days, covered
Freezer: Freeze without toppings for up to 1 month
Serve chilled for clean slices and best flavor
Why Everyone Loves This Chocolate Pie Recipe
Classic comfort dessert
Elegant enough for holidays
Easy enough for beginners
Always a crowd-pleaser
Once you try it, you’ll understand why so many bakers say you can truly master the art of chocolate pie recipe today with this method.
Conclusion
Chocolate pie is more than just dessert—it’s a celebration of simple ingredients transformed into something unforgettable. With this step-by-step guide, you now have everything you need to master the art of chocolate pie recipe today and make it confidently, beautifully, and deliciously.
So grab your whisk, choose your favorite chocolate, and let your kitchen smell like pure magic 🍫✨