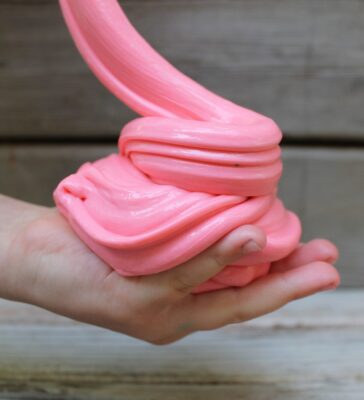
Fun, stretchy, and oh-so-satisfying — perfect for kids, crafters, and curious adults alike!
If you’ve ever wanted to make your own slime at home, you’re in the right place! This easy slime recipe is safe, simple, and uses everyday household ingredients. Whether you’re crafting with kids, exploring science, or just want a fun sensory activity, you’ll love how quick and creative this slime is to make.
Let’s dive in and make the best easy slime recipe ever! 👇
🧴 H2: Why Everyone Loves Slime
Slime is more than just a trend — it’s a timeless DIY activity that mixes creativity, science, and fun. Kids adore it for its squishy, stretchy texture, and parents love it because it keeps little hands busy for hours.
Here’s why making your own slime is amazing:
✅ Budget-friendly — you only need a few cheap ingredients
✅ Customizable — make it fluffy, glittery, scented, or colorful
✅ Educational — teaches kids basic chemistry and textures
✅ Fun for all ages — great for birthday parties or rainy days
🌈 Fun Fact: Slime was originally invented in 1976 by Mattel as a green gooey toy — now it’s a creative craze worldwide!
🧂 H2: Ingredients You’ll Need
For this easy slime recipe, you’ll only need a handful of common household ingredients:
🧴 Basic Slime Recipe
1 cup white school glue (PVA-based)
½ cup warm water
1 tsp baking soda
1–2 tbsp saline solution (contact lens solution)
Food coloring (optional)
🌈 Optional Add-Ins for Fun Variations
Glitter ✨
Sequins or confetti
Shaving cream (for fluffy slime)
Lotion or baby oil (for extra stretch)
Scented oils (for sensory slime)
💡 Tip: Always make sure your contact solution contains boric acid or sodium borate — that’s what activates the slime!
🧪 H2: Step-by-Step — Make the Best Easy Slime Recipe Ever!
This recipe takes just 5–10 minutes from start to finish. Let’s get slimy!
🧴 Step 1: Mix the Glue and Water
Pour your white glue into a mixing bowl. Add warm water and stir until well combined. This helps thin the glue for smoother slime.
🎨 Step 2: Add Color and Texture
Drop in your favorite food coloring and stir. Go bold with neon pink, calming blue, or swirly rainbow colors.
Want glitter slime? Add glitter now and mix until sparkly and magical! ✨
🧂 Step 3: Add Baking Soda
Stir in 1 teaspoon of baking soda — this gives your slime the right texture and helps it hold its shape.
👁️ Step 4: Activate with Saline Solution
Add 1 tablespoon of saline solution and mix well. You’ll notice the slime starting to pull away from the sides of the bowl.
If it’s still sticky, add another ½ tablespoon of saline solution and keep stirring.
⚗️ Science Tip: The borate ions in saline solution react with the glue’s polyvinyl acetate, turning it from a liquid into a stretchy solid!
🤲 Step 5: Knead and Stretch
Once your slime starts forming, take it out of the bowl and knead it with your hands. The more you knead, the less sticky it becomes and the stretchier it gets.
You did it! You’ve just learned how to make the best easy slime recipe ever!
🫧 H2: Creative Slime Variations to Try
Slime is all about creativity. Once you’ve mastered the basic recipe, try these fun versions:
☁️ Fluffy Slime
Add 2–3 cups of shaving cream before mixing in the saline solution. The result? Soft, foamy, cloud-like slime that’s super fun to squish!
🌸 Scented Slime
Add a drop or two of essential oils (like lavender or lemon) to make relaxing sensory slime. Perfect for stress relief!
🌈 Rainbow Slime
Make separate batches of colored slime and swirl them together for a stunning rainbow effect.
💫 Glitter Galaxy Slime
Use black or dark blue food coloring and add fine glitter — it looks just like the night sky!
🍦 Butter Slime
Mix in a spoonful of soft clay (like Model Magic) to give your slime a smooth, buttery texture.
🧼 H2: Storage and Care Tips
Your slime can last for weeks if stored properly! Here’s how to keep it fresh and stretchy:
✅ Store in an airtight container or zip-seal bag
✅ Keep away from heat or direct sunlight
✅ Wash hands before and after playing to keep it clean
✅ If it gets too sticky, add a tiny bit more saline solution and knead again
🧊 Pro Tip: If your slime dries out, add a few drops of warm water and knead until soft again.
⚠️ H2: Safety Tips for Making Slime
Slime is safe and fun, but always follow these simple rules — especially with young children:
🚫 Do not eat slime (it’s for play only!)
🧤 Supervise kids under 6 during playtime
🧽 Wash hands and clean surfaces afterward
🧴 Use non-toxic glue and a safe saline solution
💚 If you prefer a borax-free slime recipe, you can use cornstarch and dish soap instead — perfect for sensitive skin!
🎉 H2: Why You’ll Love Making This Easy Slime Recipe
Making slime isn’t just about play — it’s about creativity, bonding, and exploration. Kids learn about texture, cause and effect, and simple chemistry while having a blast.
From sparkly unicorn slime to fluffy clouds or galaxy vibes, each batch is unique — and that’s what makes it magical.
So, gather your ingredients, roll up your sleeves, and make the best easy slime recipe ever! 🌈✨
🧪 H2: Final Thoughts
This simple DIY slime recipe is a guaranteed hit for all ages. It’s quick, mess-friendly, and endlessly customizable — perfect for classrooms, parties, or just a fun afternoon at home.
The best part? You can experiment endlessly — change the colors, add fun textures, and even mix scents for a multi-sensory experience.
So go ahead — grab your glue and glitter, and make the best easy slime recipe ever! Your next craft day just got a whole lot more fun. 🎨💫