Few desserts capture hearts quite like red velvet cake. With its vibrant crimson layers, soft and moist crumb, and smooth cream cheese frosting, this classic treat feels both indulgent and elegant. Whether you’re baking for a birthday, holiday, or simply craving something special, it’s time to try this red velvet cake recipe today!
This guide walks you through everything you need to know — from the perfect ingredient ratios to expert baking tips — to help you create a bakery-quality cake at home. Let’s uncover what makes red velvet cake so irresistible and how you can master it in your own kitchen.
What Makes Red Velvet Cake So Special?
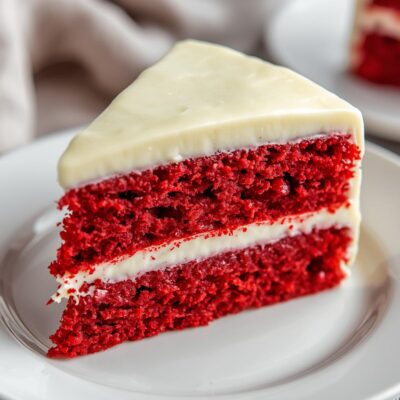
Red velvet isn’t just a chocolate cake dyed red — it’s a culinary masterpiece with a delicate balance of flavors. Traditionally, this cake combines buttermilk, cocoa powder, and a hint of vinegar, which together give it a soft texture and subtle tang. The color originally came from natural reactions between cocoa and acid, but today, bakers often enhance it with red food coloring for that iconic look.
A Slice of History
The origins of red velvet cake date back to the early 1900s, when “velvet cakes” became popular for their smooth texture. During the 1940s, the cake gained national attention in North America, and by the 1980s, it became a symbol of luxury and celebration.
Now, it’s a year-round favorite — and whether you prefer it in cupcake form, layered with cream cheese frosting, or even as a holiday centerpiece, it’s time to try this red velvet cake recipe today!
Ingredients You’ll Need
Before we begin, gather these ingredients to ensure baking success:
For the Cake:
2 ½ cups (310 g) all-purpose flour
1 ½ cups (300 g) granulated sugar
1 tsp baking soda
1 tsp salt
1 tsp cocoa powder (unsweetened)
1 ½ cups (360 ml) vegetable oil
1 cup (240 ml) buttermilk, room temperature
2 large eggs
2 tbsp red food coloring (liquid or gel)
1 tsp white vinegar
2 tsp pure vanilla extract
For the Cream Cheese Frosting:
16 oz (450 g) cream cheese, softened
½ cup (115 g) unsalted butter, softened
4 cups (500 g) powdered sugar
2 tsp vanilla extract
Equipment:
Two 9-inch round cake pans
Electric mixer
Mixing bowls
Cooling racks
Having everything prepped and ready makes it easier to try this red velvet cake recipe today! without missing a beat.
How to Make the Perfect Red Velvet Cake
Follow these simple steps for a show-stopping cake that looks and tastes divine.
Step 1: Preheat and Prepare
Preheat your oven to 350°F (175°C). Grease two 9-inch round pans and line the bottoms with parchment paper to prevent sticking.
Step 2: Mix the Dry Ingredients
In a medium bowl, whisk together the flour, sugar, baking soda, salt, and cocoa powder. This ensures an even texture and prevents clumping.
Step 3: Combine the Wet Ingredients
In a large bowl, beat the oil, buttermilk, eggs, red food coloring, vinegar, and vanilla extract until smooth. The batter should be vibrantly red — adjust the coloring to your preference.
Step 4: Blend Wet and Dry Mixtures
Slowly add the dry ingredients to the wet mixture, beating on low speed until combined. Don’t overmix; the goal is a smooth, thick batter that will yield a tender crumb.
Step 5: Pour and Bake
Divide the batter evenly between the pans. Bake for 25–30 minutes, or until a toothpick inserted into the center comes out clean.
Once baked, cool the cakes in their pans for 10 minutes before transferring them to a wire rack. Let them cool completely before frosting.
Step 6: Make the Cream Cheese Frosting
Beat the cream cheese and butter together until creamy. Gradually add powdered sugar, one cup at a time, followed by vanilla. Continue beating until fluffy and smooth.
This silky frosting perfectly complements the cake’s tangy richness — one taste and you’ll understand why people say, “You must try this red velvet cake recipe today!”
Step 7: Assemble the Cake
Place one cake layer on a serving plate. Spread a generous amount of frosting on top.
Add the second layer and cover the entire cake with frosting, using a spatula to smooth the edges.
For an extra touch, crumble a small piece of cake and sprinkle the crumbs on top as decoration.
Now you have a classic red velvet masterpiece ready to impress.
Practical Tips for Red Velvet Perfection
To ensure your cake turns out moist, flavorful, and picture-perfect, here are some tried-and-true tips from experienced bakers.
1. Use Room-Temperature Ingredients
Cold eggs or buttermilk can cause the batter to curdle. Always let ingredients sit at room temperature for 30 minutes before mixing.
2. Don’t Skip the Vinegar
The vinegar reacts with baking soda to create the cake’s soft, fluffy texture. It also enhances the color of the cocoa.
3. Measure Accurately
Use a kitchen scale if possible. Too much flour can make your cake dense, while too little oil may lead to dryness.
4. Choose the Right Food Coloring
Gel food coloring provides richer color without adding too much liquid. If using natural alternatives, beetroot powder is a great choice for a subtle hue.
5. Frost Only When Cool
Never frost a warm cake — it will melt the frosting. Chill the cake for 15–20 minutes before layering for best results.
Fun Variations to Try
Once you’ve mastered the basic recipe, experiment with fun twists on the traditional version:
Red Velvet Cupcakes
Bake the batter in a muffin tin for 18–20 minutes and top with mini swirls of cream cheese frosting. Perfect for parties or picnics!
Red Velvet Cheesecake
Combine your red velvet layers with a cheesecake center for a decadent hybrid dessert that everyone will rave about.
Gluten-Free or Vegan Red Velvet
Use gluten-free flour blends and substitute buttermilk with plant-based milk plus vinegar or lemon juice. There are endless ways to customize this beloved recipe while keeping it delicious.
So whether you’re baking for Valentine’s Day, Christmas, or just a cozy weekend at home, try this red velvet cake recipe today! You’ll be amazed at how simple and rewarding it is.
Why You’ll Love Making Red Velvet Cake
Beyond the taste, there’s something deeply satisfying about baking this cake from scratch.
It’s visually stunning: The deep red hue against white frosting makes every slice picture-perfect.
It’s universally loved: Whether served at birthdays or weddings, red velvet is always a crowd-pleaser.
It’s emotionally comforting: The aroma, texture, and flavor create a nostalgic, feel-good dessert that never fails to impress.
Once you bake it yourself, you’ll see why countless home bakers across the US, UK, and Canada say, “Try this red velvet cake recipe today — you’ll fall in love with it!”
Storage and Serving Tips
Storage: Keep leftover cake covered in the refrigerator for up to 5 days. Bring to room temperature before serving for the best texture.
Freezing: Wrap slices individually and freeze for up to 2 months. Defrost overnight in the fridge.
Serving suggestion: Pair with fresh berries, a cup of coffee, or a glass of milk for the ultimate dessert experience.
Common Mistakes to Avoid
Even experienced bakers can make small missteps. Avoid these common issues:
Overmixing the batter: This creates a dense, chewy texture instead of a light crumb.
Skipping the parchment paper: Red velvet is delicate and can stick to pans easily.
Too much food coloring: Start with less and build up gradually.
Overbaking: The cake should spring back when touched — check early to avoid dryness.
These small details can make the difference between an average cake and a stunning success.
Conclusion: Try This Red Velvet Cake Recipe Today!
Red velvet cake is more than dessert — it’s a celebration on a plate. With its signature red hue, tender crumb, and tangy-sweet frosting, it’s no wonder it’s adored across generations and continents.
Whether you’re baking it for a loved one or simply treating yourself, the process is simple, the ingredients are easy to find, and the results are unforgettable.
So don’t wait another day — try this red velvet cake recipe today! You’ll discover just how delightful it is to create this timeless classic right in your own kitchen. Once you taste it, it’s sure to become a tradition in your home, too.