Looking for a fun and easy science activity that doubles as sensory play? Then you absolutely need to try this Oobleck recipe today! Whether you’re a parent, teacher, or just someone who loves hands-on experiments, oobleck is an exciting way to explore science while getting a little messy.
This simple, two-ingredient recipe will keep kids (and adults!) entertained for hours — and it’s made entirely from household staples. Let’s dive into what oobleck is, how to make it, and why this gooey mixture is one of the most fascinating kitchen experiments you can try.
🧬 What Is Oobleck?
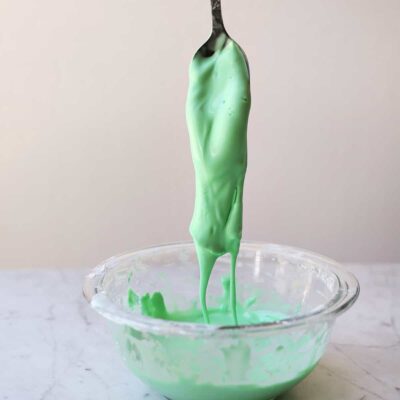
Oobleck is a non-Newtonian fluid, which means it doesn’t behave like normal liquids or solids. When you apply pressure, it feels solid — but once you let go, it flows like a liquid!
The name “Oobleck” comes from Dr. Seuss’s classic book Bartholomew and the Oobleck, where a mysterious green goo falls from the sky. Scientists and teachers adopted the term for this fun experiment that shows how physics and chemistry can mix in a hands-on way.
The magic happens when cornstarch and water combine in just the right ratio, creating a substance that defies expectations. It’s the perfect way to make science simple, fun, and educational.
So, if you want to impress your kids, students, or even your friends — try this Oobleck recipe today!
🥣 Ingredients You’ll Need
One of the best parts about this experiment is how simple it is! You’ll only need:
1 cup cornstarch (also called cornflour in the UK and Canada)
½ cup water (add more as needed)
Food coloring (optional, for fun colors)
A large bowl for mixing
A spoon or spatula
Optional Add-Ins:
Glitter for sparkle
Scented oils for aroma play
Small plastic toys for sensory exploration
🧑🔬 Step-by-Step Guide: How to Make Oobleck
Follow these easy steps to make your own oobleck in minutes!
Step 1: Add Cornstarch to the Bowl
Start by pouring 1 cup of cornstarch into a large mixing bowl. Break up any lumps with your fingers or a spoon to ensure a smooth texture.
Step 2: Add Water Slowly
Next, pour in ½ cup of water gradually while stirring. It’s important to go slowly — you don’t want to add too much at once!
You’ll notice the mixture thickening quickly. Keep mixing until the water and cornstarch are fully combined. The oobleck should feel thick but still flow slowly when you tilt the bowl.
Step 3: Add Food Coloring (Optional)
If you’d like to make your oobleck colorful, add a few drops of food coloring and mix again. Green is the classic color (inspired by Dr. Seuss), but you can experiment with pink, blue, or even swirl multiple colors together.
Step 4: Play and Experiment!
Now the fun begins! Try poking the oobleck quickly — it should feel hard and resist your touch. Then let your hand sink in slowly, and watch it melt like a liquid.
You’ve just made a non-Newtonian fluid — how cool is that? 🎉
🌈 Fun Science Behind Oobleck
Why does oobleck act so weird? The answer lies in shear thickening, a property of some fluids.
In normal liquids (like water), molecules flow freely around each other. But in oobleck, the cornstarch particles are suspended in water. When you apply pressure (like poking or squeezing), the particles lock together, creating a temporary solid. Once you stop applying force, the particles spread out again, and it flows like a liquid.
This is a great way to teach kids about states of matter, viscosity, and fluid dynamics — all through play!
So next time your child asks, “Is it a liquid or a solid?” you can confidently answer: “It’s both!”
👩🏫 Educational Uses for Oobleck
Teachers and parents love this experiment because it blends STEM learning with sensory fun. Here are a few creative ways to use oobleck in education:
1. Science Lessons
Explain the difference between solids, liquids, and gases.
Discuss how oobleck reacts under pressure (a real-world example of a non-Newtonian fluid).
Compare it to other substances like slime, honey, or ketchup.
2. Sensory Play
Perfect for younger children to explore texture and touch.
Helps develop fine motor skills as they squeeze, stir, and scoop.
Add scents or colors to stimulate multiple senses.
3. Art Projects
Use oobleck as a fun medium for color mixing.
Let it dry on paper to create unique abstract art!
Tip: Always supervise young children during play, and avoid letting them eat the mixture.
🧽 How to Clean Up Oobleck
Oobleck is tons of fun — but cleanup can get messy if you’re not careful. Here’s how to do it the right way:
Don’t pour oobleck down the drain! It can clog pipes because cornstarch thickens in water.
Instead, let it dry out in the bowl overnight or scrape it into the trash.
Wipe surfaces with warm, soapy water and a sponge.
Wash hands thoroughly after play.
If you made colored oobleck, be careful with fabric and carpets — food coloring can stain.
Pro Tip: Play with oobleck outdoors or on a tray to make cleanup even easier!
💡 Oobleck Variations to Try
Want to take your oobleck experience to the next level? Here are some fun variations:
1. Glow-in-the-Dark Oobleck
Add glow powder or tonic water (under a blacklight) for an exciting nighttime experiment.
2. Glitter Oobleck
Mix in fine glitter for a sparkly, magical look that kids love.
3. Rainbow Oobleck
Make multiple batches in different colors and swirl them together in one bowl — mesmerizing!
4. Frozen Oobleck
Place oobleck in the freezer for a couple of hours, then let it thaw. Observe how its texture changes!
5. Themed Oobleck Play
Add toy dinosaurs, cars, or ocean animals to match a learning theme (like “dinosaur dig” or “ocean slime”).
🧠 Learning Outcomes
By the end of this simple activity, kids (and adults!) will have learned:
The concept of non-Newtonian fluids
The difference between solids and liquids
How pressure affects viscosity
The fun side of hands-on science
It’s a perfect example of how learning through play can make science exciting and accessible.
📦 Storage Tips
Oobleck doesn’t last long, but you can store it for short-term play.
Store in an airtight container for 1–2 days.
If it dries out, just add a bit of water and stir.
If it smells off or gets moldy, it’s time to make a fresh batch.
🌟 Conclusion: Try This Oobleck Recipe Today!
Oobleck is the ultimate mix of fun, science, and creativity — and the best part? It’s made from simple ingredients you already have in your kitchen.
Whether you’re a parent looking for a rainy-day activity, a teacher planning a hands-on science lesson, or just someone who loves cool experiments, you’ll want to try this Oobleck recipe today!
With just cornstarch and water, you can explore how matter behaves, inspire curiosity, and enjoy hours of laughter and discovery.
So grab your bowl, pour in some cornstarch, and get ready to dive into one of the most satisfying science activities ever. Once you try it, you’ll understand why people everywhere are saying — “You’ve got to try this Oobleck recipe today!”
✅ Meta Title:
Try This Oobleck Recipe Today – Easy Science Experiment for Kids
✅ Meta Description:
Try this Oobleck recipe today! Make a fun, non-Newtonian fluid with just cornstarch and water. Perfect for science lessons, sensory play, and family fun.