Sugar waxing is a popular, natural alternative to traditional waxing. It’s gentle on the skin, easy to make, and inexpensive. This delicious sugar wax recipe you’ll love is perfect for removing unwanted hair at home safely and effectively.
With just a few pantry ingredients, you can create a wax that’s ready to use on legs, arms, underarms, or even the face.
Why Sugar Wax Is Amazing
Natural and chemical-free
Less painful than traditional wax
Easy to clean (water-soluble)
Exfoliates skin while removing hair
Cost-effective and simple to make
It’s also safe for most skin types, including sensitive skin.
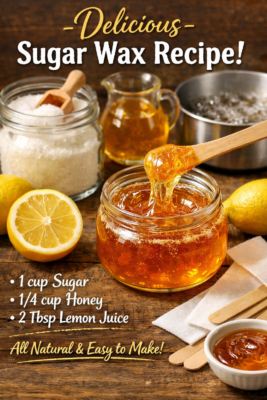
Ingredients (Makes 1 Cup)
1 cup granulated sugar
¼ cup lemon juice (freshly squeezed is best)
¼ cup water
Optional: 1 tsp honey (for extra smoothness and hydration)
How to Make Sugar Wax
Step 1: Combine Ingredients
In a saucepan, mix sugar, lemon juice, water, and honey.
Step 2: Heat
Cook over medium heat, stirring constantly to prevent burning.
Bring the mixture to a boil, then reduce to low.
Step 3: Cook Until Golden
Continue stirring for 5–10 minutes until the mixture turns a golden amber color and thickens slightly.
Test a small amount—if it pulls into a soft ball, it’s ready.
Step 4: Cool Slightly
Let the sugar wax cool to warm, but not hot—safe for skin application.
How to Use Sugar Wax
Clean and dry the skin area.
Dust lightly with baby powder (optional) for dry skin).
Apply a thin layer of sugar wax in the direction of hair growth.
Press a cloth strip over the wax.
Pull the strip off quickly against the direction of hair growth.
Rinse skin with warm water.
💡 Sugar wax is water-soluble, so cleaning up is quick and easy.
Practical Tips for Best Results
Apply wax on clean, dry skin
Hair should be ¼–½ inch long for best removal
Stretch skin slightly while pulling strips for less discomfort
Avoid sun exposure or hot showers immediately after waxing
Store leftover sugar wax in a sealed jar for up to 2 weeks
Benefits of Sugar Wax Over Traditional Wax
Less skin irritation
Less risk of burns
Easy to make at home
Cost-effective for repeated use
Exfoliates dead skin for smoother results
Optional Variations
🌿 Add a few drops of lavender or tea tree oil for soothing and antibacterial effects
🍯 Add more honey for extra moisturizing benefits
🍋 Adjust lemon juice for your desired consistency and stickiness
Conclusion
This delicious sugar wax recipe you’ll love is simple, natural, and effective. With minimal ingredients and a little time, you can create a gentle, exfoliating wax at home that leaves your skin smooth and soft.
Start small, follow the tips, and enjoy salon-quality results without leaving your house!