Smooth, glowing skin doesn’t have to come from expensive spa treatments or luxury skincare brands. In fact, one of the most effective exfoliating products can be made right at home with ingredients you probably already have. You won’t believe how easy this sugar scrub recipe is! It’s quick to prepare, completely customizable, and gentle enough for regular use.
Sugar scrubs have become a skincare favorite because they naturally exfoliate, hydrate, and refresh the skin without harsh chemicals. Whether you’re looking to elevate your self-care routine, create thoughtful handmade gifts, or simply save money, this guide will walk you through everything you need to know to make the perfect sugar scrub—effortlessly.
What Is a Sugar Scrub?
A sugar scrub is a natural exfoliant made by combining sugar granules with nourishing oils and optional scents.
Why Sugar Works So Well
Sugar crystals gently remove dead skin cells
Natural humectant properties help retain moisture
Softer than salt, making it suitable for sensitive skin
That’s why sugar scrubs are loved for face, lips, hands, and body care.
Benefits of Using a Homemade Sugar Scrub
Before we dive into the recipe, let’s explore why DIY sugar scrubs are so popular.
Top Benefits
Removes dead skin cells naturally
Improves skin texture and softness
Boosts circulation
Enhances absorption of moisturizers
Free from harsh chemicals
Once you try it, you’ll see why people say, you won’t believe how easy this sugar scrub recipe is!
Basic Ingredients You’ll Need
This sugar scrub recipe uses simple, affordable ingredients.
Core Ingredients
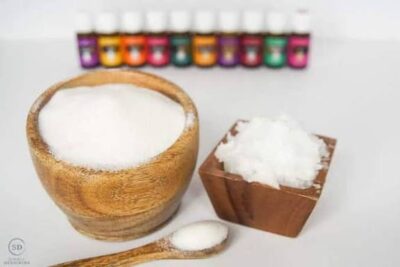
1 cup granulated sugar (white, brown, or cane sugar)
½ cup oil (coconut, olive, almond, or jojoba oil)
Optional Add-Ins
Essential oils (lavender, peppermint, lemon)
Honey for extra hydration
Vitamin E oil
Citrus zest or vanilla extract
The beauty of this recipe is how flexible it is.
How to Make the Easiest Sugar Scrub Recipe
Step-by-Step Instructions
Add sugar to a clean mixing bowl
Slowly pour in oil while stirring
Mix until you reach a thick, scoopable consistency
Add optional scents or extras
Transfer to an airtight container
That’s it—you won’t believe how easy this sugar scrub recipe is! Total prep time: under 5 minutes.
Choosing the Right Sugar for Your Skin
Different sugars offer different benefits.
Sugar Types Explained
White sugar: Fine texture, great for sensitive skin
Brown sugar: Softer granules, ideal for face and lips
Raw sugar: Coarser, best for body exfoliation
Match the sugar to the area you plan to exfoliate.
Best Oils to Use in Sugar Scrubs
Oils provide moisture and nourishment.
Popular Oil Options
Coconut oil: Deeply moisturizing, antibacterial
Olive oil: Rich in antioxidants
Sweet almond oil: Lightweight and soothing
Jojoba oil: Closely mimics skin’s natural oils
Choose oils based on your skin type and preferences.
How to Use a Sugar Scrub Correctly
Using a sugar scrub the right way ensures the best results.
Application Tips
Use on damp skin
Massage gently in circular motions
Avoid harsh rubbing
Rinse with warm water
Pat skin dry and moisturize
Use 1–2 times per week for optimal results.
Sugar Scrub Variations You’ll Love
Once you master the base recipe, try these fun variations.
Relaxing Lavender Scrub
Add 10 drops lavender essential oil
Perfect for nighttime routines
Energizing Citrus Scrub
Add lemon or orange essential oil
Boosts circulation and mood
Vanilla Sugar Scrub
Add vanilla extract for a warm scent
Great for gifting
Coffee Sugar Scrub
Mix in coffee grounds for extra exfoliation
Helps reduce the appearance of cellulite
These variations prove how versatile sugar scrubs can be.
Sugar Scrub for Face vs. Body
Not all scrubs are one-size-fits-all.
Face Scrub Tips
Use fine sugar (brown or powdered)
Gentle pressure only
Avoid sensitive areas
Body Scrub Tips
Use coarser sugar
Focus on elbows, knees, and heels
Tailoring your scrub ensures safe and effective exfoliation.
Storage and Shelf Life Tips
Proper storage keeps your scrub fresh.
Storage Guidelines
Use airtight containers
Keep away from water
Store in a cool, dry place
Shelf Life
Up to 2 months without water exposure
Add vitamin E oil to extend freshness
Always use clean hands or a spoon to scoop product.
Common Sugar Scrub Mistakes to Avoid
Using too much pressure
Applying on broken or irritated skin
Over-exfoliating
Allowing water into the container
Avoiding these mistakes keeps your skin healthy and glowing.
Why This Sugar Scrub Recipe Is So Popular
People love this recipe because it’s:
Fast and beginner-friendly
Budget-conscious
Customizable
Effective and gentle
It’s no surprise so many people say, you won’t believe how easy this sugar scrub recipe is!
Perfect Occasions to Use or Gift Sugar Scrubs
Self-care days
Bridal showers
Holidays
Birthdays
Thank-you gifts
Homemade sugar scrubs are thoughtful, practical, and beautiful.
Conclusion
Glowing skin doesn’t require complicated routines or expensive products. With just a few ingredients and minutes of your time, you can create a luxurious exfoliant at home. You won’t believe how easy this sugar scrub recipe is! It’s gentle, effective, and endlessly customizable to suit your skin’s needs.
Whether you’re pampering yourself or sharing handmade gifts, this sugar scrub recipe proves that simple skincare can still feel indulgent. Once you try it, it’s sure to become a staple in your beauty routine.