Soft, fluffy, cloud-like marshmallows are one of those treats that feel magical when made from scratch. If you’ve only ever tried store-bought versions, you’re in for a surprise—homemade marshmallows are fresher, more flavorful, and endlessly customizable. Best of all, they’re easier than most people think.
This ultimate marshmallow recipe guide walks you through everything you need to know: ingredients, step-by-step instructions, expert tips, flavor variations, and common mistakes to avoid. Whether you’re cooking in the United States, the United Kingdom, or Canada, this guide has you covered.
Why Make Marshmallows at Home?
Homemade marshmallows stand out for several reasons:
Softer, lighter texture
Cleaner, richer flavor
No artificial preservatives
Easy to customize (vanilla, chocolate, fruit, vegan options)
Once you try a homemade marshmallow recipe, it’s hard to go back.
What Are Marshmallows Made Of?
Classic marshmallows rely on just a few core ingredients:
Gelatin – gives structure and fluff
Sugar – sweetness and stability
Corn syrup or glucose syrup – prevents crystallization
Water – dissolves ingredients
Vanilla extract – flavor
Despite the short list, technique is what makes the difference.
Classic Homemade Marshmallow Recipe (Step-by-Step)
Ingredients
3 packets (about 21 g) unflavored gelatin
1 cup cold water (divided)
1½ cups granulated sugar
1 cup light corn syrup or glucose syrup
¼ teaspoon salt
1–2 teaspoons vanilla extract
Powdered sugar + cornstarch (for dusting)
Equipment
Stand mixer or hand mixer
Candy thermometer
Medium saucepan
9×13 inch pan
Rubber spatula
Instructions
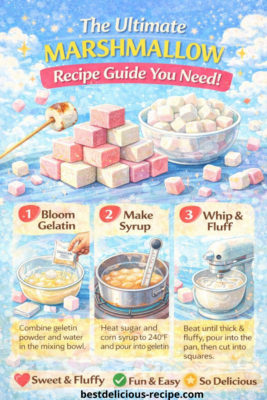
Step 1: Bloom the Gelatin
Pour ½ cup cold water into the mixer bowl. Sprinkle gelatin over the water and let it bloom for 10 minutes.
Step 2: Cook the Sugar Syrup
In a saucepan, combine remaining ½ cup water, sugar, corn syrup, and salt. Heat over medium until sugar dissolves. Increase heat and cook until it reaches 240°F (115–116°C)—the soft-ball stage.
Step 3: Whip the Marshmallow Base
With the mixer on low, slowly pour the hot syrup into the bloomed gelatin. Increase speed to high and whip for 10–12 minutes, until thick, white, and fluffy.
Step 4: Add Flavor
Add vanilla extract and whip for another 30 seconds.
Step 5: Set the Marshmallows
Pour the mixture into a prepared pan (lightly greased and dusted with powdered sugar/cornstarch). Smooth the top and dust lightly.
Step 6: Rest and Cut
Let set uncovered for 6–8 hours or overnight. Cut into squares and coat all sides with the powdered sugar mixture.
Texture Secrets: How to Get Perfect Marshmallows
Whip long enough—underwhipped marshmallows are dense
Use a candy thermometer for accuracy
Don’t rush the setting time
Keep moisture low while cutting
Perfect marshmallows should be light, springy, and slightly chewy.
Flavor Variations You’ll Love
Vanilla Bean Marshmallows
Use vanilla bean paste instead of extract for deeper flavor.
Chocolate Marshmallows
Whisk in ¼ cup cocoa powder with the gelatin or drizzle melted chocolate over finished marshmallows.
Strawberry or Raspberry Marshmallows
Add freeze-dried fruit powder during the final whipping stage.
Peppermint Marshmallows
Replace vanilla with peppermint extract—perfect for hot chocolate.
Vegan Marshmallow Option (Gelatin-Free)
For plant-based marshmallows, gelatin is replaced with agar-agar.
Key differences:
Agar sets faster
Texture is slightly firmer
Requires precise timing
Vegan marshmallows work best for topping drinks or desserts rather than roasting.
Common Marshmallow Mistakes (And How to Fix Them)
Too Sticky
➜ Use more powdered sugar coating and let them air-dry slightly.
Too Dense
➜ Whip longer and ensure syrup reaches the correct temperature.
Grainy Texture
➜ Sugar crystallized—avoid stirring syrup once it starts boiling.
Won’t Set
➜ Gelatin may be expired or syrup temperature too low.
How to Store Homemade Marshmallows
Store in an airtight container
Keep at room temperature (not the fridge)
Best within 1–2 weeks
Avoid humidity—it’s the enemy of fluffy marshmallows.
Best Ways to Use Homemade Marshmallows
Hot chocolate or coffee drinks
S’mores (they melt beautifully)
Rice crispy treats
Dessert toppings
Gift boxes and holiday treats
They’re especially popular during winter holidays in the US, UK, and Canada.
Are Homemade Marshmallows Worth It?
Absolutely. While store-bought marshmallows are convenient, homemade versions offer superior texture, flavor, and customization. Once you master the basic marshmallow recipe, you’ll find endless ways to make it your own.
Final Thoughts
This ultimate marshmallow recipe guide you need proves that homemade marshmallows aren’t just for professionals—they’re achievable, fun, and incredibly rewarding. With simple ingredients and the right technique, you can create fluffy, bakery-quality marshmallows right in your own kitchen.
Try them once, and you’ll understand why homemade marshmallows are a favorite among bakers everywhere.
☁️ Soft, sweet, and homemade—pure magic in every bite.