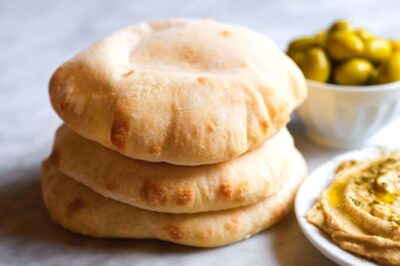
If you’ve ever tasted warm, fluffy pita fresh from the oven, then you know there’s nothing quite like it. Soft, airy, and incredibly versatile, homemade pita beats anything you can buy in a store. Whether you’re using it for dips, sandwiches, wraps, or pizza bases, learning how to make the best pita bread recipe ever will instantly upgrade your cooking game.
This guide brings you everything you need to master the process—from simple ingredients to expert baking tips. Perfect for readers in the United States, United Kingdom, and Canada, this article walks you through the science and the technique so you can enjoy bakery-style pita at home.
Why Homemade Pita?
Before we dive into the step-by-step process, let’s quickly highlight why making homemade pita is worth your time.
1. Flavor That Store-Bought Can’t Beat
Fresh pita has a lightly yeasty aroma, a soft crumb, and a satisfying chew that packaged versions simply don’t offer.
2. The Signature “Pocket”
When you make the best pita bread recipe ever, you also learn how to create that magical pocket inside—perfect for stuffing with meats, veggies, or falafel.
3. Budget-Friendly and Simple
Pita requires only a few basic pantry staples: flour, yeast, water, oil, and salt. It’s inexpensive and easier than many people think.
Ingredients You Need
To make the classic version of the best pita bread recipe ever, gather the following ingredients:
3 cups all-purpose or bread flour
1 packet (2 ¼ tsp) active dry yeast
1 teaspoon sugar
1 teaspoon salt
1 cup warm water (about 110°F / 43°C)
2 tablespoons olive oil
These ingredients produce soft, fluffy pitas with excellent puffing potential.
How to Make the Best Pita Bread Recipe Ever (Step-by-Step)
Step 1: Activate the Yeast
Add warm water, sugar, and yeast to a bowl. Let it sit for 5–10 minutes until it forms a foamy layer.
This ensures the yeast is alive and ready to work.
Why it matters:
Good activation helps the dough rise well, which is key to soft pita—and to achieving that famous pocket.
Step 2: Mix and Knead the Dough
Add flour, salt, and olive oil to the yeast mixture. Mix until combined, then knead for about 8 minutes by hand or 5 minutes in a mixer.
Texture goal:
The dough should be smooth, soft, and slightly tacky but not sticky.
Step 3: Let the Dough Rise
Place the dough in a lightly oiled bowl, cover it, and let it rise for 1–1.5 hours until doubled in size.
Pro-tip:
Warm environments help the dough rise faster. If your kitchen is cool, place the bowl inside an unheated oven with the light on.
Step 4: Divide and Shape
Punch down the dough and divide it into 8 pieces. Roll each piece into a ball, cover them, and let them rest for 10 minutes.
Why rest is important:
It relaxes the gluten, making the dough easier to roll thinly.
Step 5: Roll the Pitas
Use a rolling pin to flatten each ball into a disc about ¼ inch thick. Try to keep the thickness even across the surface.
The secret to the pocket:
Even rolling helps the heat distribute uniformly, allowing the pita to balloon and form that iconic hollow pocket.
Step 6: Bake at High Heat
Place the rolled dough on a preheated baking sheet or pizza stone in a 500°F (260°C) oven. Bake for 3–5 minutes until they puff.
What makes the puff happen?
The high heat turns water in the dough into steam, rapidly inflating your pita.
Alternative Cooking Methods
1. Stove-Top Pita
If you don’t want to heat up your oven, cook each pita in a hot skillet:
Heat a cast iron pan on medium-high
Place the rolled dough in
Cook for 30–45 seconds until bubbles form
Flip and watch it balloon
This method produces slightly crispier pitas with beautiful brown spots.
2. Air Fryer Variation
For a fun twist:
Preheat the air fryer to 400°F (204°C)
Cook pitas for 3–4 minutes
They won’t puff as dramatically, but they’ll still be delicious.
Practical Tips for Making the Best Pita Bread Recipe Ever
Use Bread Flour for Maximum Puff
Bread flour has more protein, which strengthens gluten and improves air trapping. This means better pockets and better chew.
Keep the Dough Moist
Slightly wetter dough produces softer pitas. Don’t over-flour the dough while kneading.
Bake on a Preheated Stone or Sheet
Heat is your pita’s best friend. A hot surface creates instant steam, helping the dough rise quickly.
Don’t Over-Roll
Too thin = dry, overly crisp pitas
Too thick = dense, no pocket
Aim for consistent ¼ inch thickness.
Let Pitas Cool Under a Towel
Covering them helps retain moisture and softness—especially if you like foldable, wrap-style pitas.
Store Properly
Fresh pitas dry quickly, so:
Keep them in airtight bags
Freeze extras for up to 3 months
Reheat in a skillet or toaster for best texture
Creative Ways to Use Your Homemade Pita
1. Classic Middle Eastern Sandwiches
Stuff your pita with:
Falafel
Shawarma
Grilled chicken
Hummus
Pickled vegetables
2. Pita Chips
Cut into triangles, brush with olive oil, sprinkle with spices, and bake at 400°F (204°C) for 8–10 minutes.
3. Mini Pita Pizzas
Top with sauce, cheese, and veggies. Bake until melted.
A kid-friendly favorite.
4. Breakfast Pita Pockets
Fill with eggs, sausage, spinach, and cheese for a quick morning meal.
5. Mezze Platter Staple
Serve with:
Hummus
Tzatziki
Baba ganoush
Tabouli
Perfect for parties or casual snacking.
Troubleshooting: Why Didn’t My Pita Puff?
1. Your Heat Was Too Low
Temperature is everything. Preheat your oven or pan thoroughly.
2. Dough Was Rolled Unevenly
Thick or uneven spots block steam from expanding fully.
3. Dough Too Dry
Dry dough cannot create enough steam for a proper pocket.
4. Not Enough Gluten Development
Knead long enough to build elasticity.
5. Over-Proofing
If the dough rises too long, it becomes weak and collapses instead of puffing.
Health Benefits of Homemade Pita
Making your own pita means:
No preservatives
You control the ingredients
It’s naturally low in fat
Whole-wheat variations are even healthier
Great for balanced diets in the U.S., U.K., and Canada.
Conclusion
If you’ve been searching for a foolproof way to make the best pita bread recipe ever, this guide gives you everything you need—from step-by-step instructions to expert secrets. With just a few simple ingredients and a bit of practice, you can enjoy warm, fluffy, perfectly puffed pita right from your own kitchen.
Homemade pita is delicious, versatile, budget-friendly, and satisfying to make. Whether you’re baking in the oven, firing up the stovetop, or getting creative with air frying, this recipe always delivers.
Now grab your ingredients, preheat that oven, and get ready to make the best pita bread recipe ever—your homemade bread game will never be the same!
!