Bright, tangy, and melt-in-your-mouth delicious — Homemade Lemon Bars are the perfect treat for anyone who loves a balance of sweet and citrusy flavors. The buttery crust and smooth lemon filling come together in just minutes, making this dessert ideal for busy days or last-minute gatherings. Whether you’re in the U.S., U.K., or Canada, this recipe is guaranteed to bring sunshine to your kitchen! ☀️
🍋 Why You’ll Love This Recipe
🕒 Quick and easy: Ready in under an hour, with only a few minutes of prep.
🍋 Fresh flavor: Bright, zesty lemon taste that’s perfectly balanced.
🍪 Buttery crust: The base is crisp, crumbly, and absolutely irresistible.
🎉 Crowd-pleaser: Perfect for potlucks, picnics, or afternoon tea.
🧂 Ingredients
For the Crust:
1 cup (2 sticks) unsalted butter, softened
½ cup granulated sugar
2 cups all-purpose flour
¼ teaspoon salt
For the Lemon Filling:
4 large eggs
1 ½ cups granulated sugar
¼ cup all-purpose flour
½ cup fresh lemon juice (about 2–3 lemons)
1 tablespoon lemon zest (optional but recommended!)
For Garnish:
Powdered sugar, for dusting
🥣 Step-by-Step Instructions
Step 1: Preheat and Prep
Preheat your oven to 350°F (175°C). Line a 9×13-inch baking pan with parchment paper or lightly grease it with butter.
Step 2: Make the Crust
In a large bowl, cream together butter and sugar until light and fluffy.
Mix in flour and salt until combined and crumbly.
Press the dough evenly into the bottom of the prepared pan.
Bake for 15–18 minutes, or until the edges are lightly golden.
💡 Pro Tip: Don’t overbake the crust — you want it firm but pale, so it blends perfectly with the lemon layer.
Step 3: Whip Up the Lemon Filling
While the crust is baking:
In another bowl, whisk together eggs, sugar, flour, lemon juice, and zest until smooth.
Pour this lemon mixture over the warm crust immediately after it comes out of the oven.
Step 4: Bake to Perfection
Return the pan to the oven and bake for 20–25 minutes, or until the center is set and slightly firm to the touch.
Let the lemon bars cool completely — this helps them set properly and makes slicing easier.
Step 5: Slice and Serve
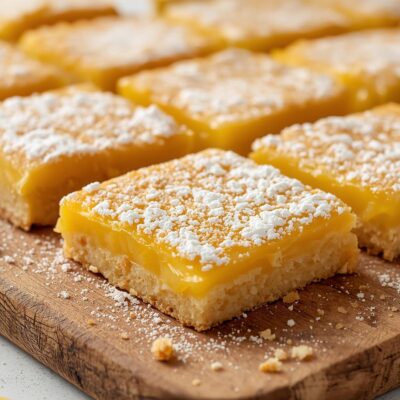
Once cooled, dust generously with powdered sugar, then cut into squares or triangles.
🍋 Serve chilled or at room temperature for the perfect treat!
🍰 Variations to Try
Coconut Lemon Bars: Add ½ cup shredded coconut to the crust for a tropical twist.
Creamy Lemon Bars: Stir 2 tablespoons of cream cheese into the filling for extra richness.
Lavender Lemon Bars: Add ½ teaspoon dried culinary lavender for a floral note.
Gluten-Free Option: Use almond or oat flour in place of all-purpose flour.
🧊 Storage Tips
Room temperature: Keep covered for up to 2 days.
Refrigerator: Store in an airtight container for up to a week.
Freezer: Freeze individually wrapped squares for up to 3 months.
To serve from frozen, just thaw at room temperature for about 30 minutes.
💛 Perfect Pairings
These Homemade Lemon Bars taste heavenly with:
A cup of hot tea or coffee ☕
A scoop of vanilla ice cream 🍨
Fresh berries for a burst of color 🍓
They’re also a beautiful addition to brunch tables, bake sales, and baby showers.
🌼 Quick Baking Tips
✨ Always use fresh lemons — bottled juice can’t compare in flavor.
✨ Chill before cutting for clean, sharp edges.
✨ For extra zing, sprinkle lemon zest over the powdered sugar.
✨ If your filling is too tart, add an extra tablespoon of sugar to balance it out.
🍋 Final Thoughts
With their buttery crust, silky lemon filling, and sunny flavor, these Homemade Lemon Bars Recipe in Minutes! will brighten your day in every bite. They’re easy, elegant, and always a hit wherever you bring them.
So next time you crave something sweet and refreshing, skip the store-bought desserts and make these lemony delights right at home — your family and friends will thank you! 💛🍋