If you’re looking for a natural, affordable, and effective hair removal method, sugar waxing (also known as sugaring) is the perfect DIY solution. Made with just a few pantry ingredients — sugar, lemon juice, and water — this ancient beauty technique has been loved for centuries for its simplicity and smooth results.
In this guide, we’ll show you exactly how to make a Delicious Sugar Wax Recipe You’ll Love! Whether you’re a first-timer or a seasoned DIY beauty enthusiast, you’ll learn how to create a smooth, golden sugar paste that leaves your skin soft, hair-free, and glowing — all without harsh chemicals or expensive salon visits.
Why You’ll Love This Sugar Wax Recipe
This Delicious Sugar Wax Recipe You’ll Love! isn’t just about beauty — it’s about empowerment and sustainability. Here’s why it’s a game-changer:
✅ All-natural ingredients: No artificial colors, fragrances, or preservatives.
✅ Budget-friendly: Uses basic kitchen staples you already have.
✅ Gentle on skin: Less irritation compared to traditional waxing.
✅ Eco-friendly: No strips or waste — just reusable fabric or your hands!
✅ Effective results: Removes hair from the root for long-lasting smoothness.
With a bit of practice, sugar waxing can become your go-to hair removal method that feels just as luxurious as a spa treatment — minus the hefty price tag.
Ingredients for the Perfect Sugar Wax
To make the Delicious Sugar Wax Recipe You’ll Love!, you only need three natural ingredients:
2 cups granulated sugar
¼ cup lemon juice (freshly squeezed)
¼ cup water
Optional: A few drops of essential oil (like lavender or tea tree) for soothing properties.
These simple ingredients combine to create a golden, sticky paste that works like magic on unwanted hair.
Step-by-Step: How to Make Sugar Wax at Home
1. Mix Your Ingredients
In a medium saucepan, combine the sugar, lemon juice, and water. Stir gently until all the ingredients are well mixed and the sugar begins to dissolve.
2. Heat the Mixture
Place the saucepan over medium heat. Stir occasionally until the sugar begins to bubble. The key here is patience — you don’t want to burn the sugar.
After about 8–10 minutes, the mixture should turn into a golden honey color. The consistency should be thick but still pourable.
👉 Pro Tip: Use a candy thermometer if you have one — aim for around 240°F (115°C) for the perfect texture.
3. Cool the Mixture
Once the mixture reaches the right color and consistency, remove it from the heat immediately. Let it cool for at least 20–30 minutes until it’s warm but safe to touch.
Pour the wax into a heatproof jar or container. It will thicken slightly as it cools.
4. Test the Wax
Before applying, test a small amount on your wrist to ensure it’s not too hot. The texture should be pliable — soft enough to spread but not runny.
How to Use Sugar Wax
Step 1: Prepare Your Skin
Cleanse and dry the area you plan to wax.
Lightly dust with cornstarch or baby powder to absorb any oil or moisture — this helps the wax grip the hair better.
Step 2: Apply the Wax
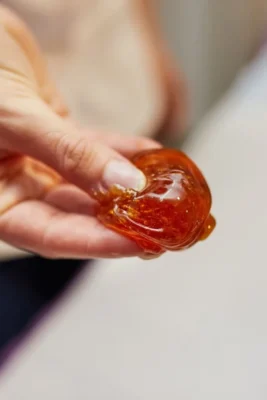
If you’re using the traditional sugaring method, scoop up a ball of wax with your fingers. Stretch and knead it until it becomes more elastic.
Spread it against the direction of hair growth and then quickly flick it in the direction of growth.
Alternatively, if your wax is softer, use a spatula to apply it and a fabric strip to remove it — just like regular waxing.
Step 3: Remove & Repeat
Pull swiftly and confidently! Repeat on all desired areas, reusing the same piece of wax a few times before discarding.
Areas You Can Use It On
The Delicious Sugar Wax Recipe You’ll Love! is gentle enough for most parts of the body, including:
Legs
Arms
Underarms
Face (upper lip, chin)
Bikini line
Avoid broken or irritated skin, and always patch test before full use if you’re new to sugaring.
Practical Tips for Best Results
💡 Tip 1: Don’t overcook!
If the wax turns too dark or hard, it’s overcooked. Add a teaspoon of water and reheat gently to soften it.
💡 Tip 2: Warm before reuse.
If your wax cools and stiffens, place the jar in warm water for a few minutes to soften it.
💡 Tip 3: Keep skin dry.
Moisture prevents the wax from sticking well — always work on clean, dry skin.
💡 Tip 4: Work in small sections.
Smaller areas give you more control and reduce discomfort.
💡 Tip 5: Exfoliate 24 hours before waxing.
This helps prevent ingrown hairs and allows smoother hair removal.
Common Mistakes to Avoid
❌ Using too much lemon juice: This can make the wax too runny or sticky. Stick to the recipe ratio.
❌ Applying wax when too hot: Always test the temperature to avoid burns.
❌ Washing the area right after waxing: Wait a few hours before applying lotion or water to prevent irritation.
Aftercare Tips
Apply aloe vera gel or coconut oil to soothe and moisturize the skin.
Avoid sun exposure, tight clothing, and heavy exercise for 24 hours.
Exfoliate lightly after 2–3 days to prevent ingrown hairs.
These steps ensure your results from the Delicious Sugar Wax Recipe You’ll Love! last longer and your skin stays soft and radiant.
Benefits of Homemade Sugar Wax
Compared to store-bought waxes, DIY sugar wax stands out:
Feature Store-Bought Wax Homemade Sugar Wax
Cost Expensive Budget-friendly
Ingredients Synthetic additives All-natural
Pain level Higher Gentler on skin
Eco-friendliness Single-use strips Reusable/low waste
Not only does this Delicious Sugar Wax Recipe You’ll Love! save money, but it also keeps your beauty routine cleaner, safer, and more sustainable.
Storage
Store your sugar wax in an airtight glass jar at room temperature. It lasts up to 1 month. To reuse, warm it gently in a microwave (10–15 seconds) or place the jar in a bowl of hot water until soft.
FAQs
Q: Can I use brown sugar instead of white sugar?
Yes! Brown sugar gives a slightly richer color and texture — just watch it closely while cooking.
Q: What if my wax is too hard?
Add 1–2 teaspoons of water and reheat gently until it softens.
Q: Is sugar waxing suitable for sensitive skin?
Absolutely! Since it’s all-natural and water-soluble, it’s gentler than traditional wax.
Conclusion
Now that you know how to make a Delicious Sugar Wax Recipe You’ll Love!, you’ll never need to buy store-bought wax again. With just sugar, lemon, and water, you can create a smooth, skin-friendly hair removal paste that’s easy, affordable, and effective.
Whether you’re prepping for summer or simply enjoy DIY skincare, this homemade sugar wax gives you silky results and total control over what goes on your skin.
So, grab your saucepan and ingredients today — your new favorite beauty ritual is waiting! 💛