Soft, fluffy, and melt-in-your-mouth delicious—marshmallows are one of those sweet treats that never go out of style. Whether you enjoy them in hot cocoa, roasted over a campfire, or as a key ingredient in desserts like Rice Krispie treats, homemade marshmallows add a touch of magic you can’t get from the store-bought versions.
This is the ultimate marshmallow recipe guide you need, packed with step-by-step instructions, creative flavor twists, and expert tips to make your marshmallows perfect every time.
💡 Why Make Homemade Marshmallows?
Freshness & Flavor: Softer and tastier than packaged ones.
Customizable: Choose your favorite flavors, colors, or shapes.
Fun for All Ages: Great project for kids and adults alike.
Impressive Gift Idea: Beautiful when packaged in jars or bags.
🛒 Essential Ingredients
To make a classic marshmallow recipe, you’ll need:
3 packages unflavored gelatin
1 cup cold water (divided into ½ cup + ½ cup)
1 ½ cups granulated sugar
1 cup light corn syrup
¼ tsp salt
1 tsp vanilla extract (or flavoring of choice)
Confectioners’ sugar (for dusting)
🥄 Step-by-Step Instructions
1. Prepare Your Pan
Grease a 9×13-inch baking pan and dust it lightly with confectioners’ sugar.
2. Bloom the Gelatin
Pour ½ cup cold water into a large mixing bowl. Sprinkle the gelatin over the water and let it sit for about 10 minutes to bloom.
3. Cook the Sugar Mixture
In a saucepan, combine sugar, corn syrup, salt, and the remaining ½ cup of water. Heat over medium-high, stirring until sugar dissolves. Insert a candy thermometer and cook until the mixture reaches 240°F (soft-ball stage).
4. Combine & Whip
Slowly pour the hot sugar syrup into the bloomed gelatin while mixing on low speed. Once combined, increase to high speed and whip for 10–12 minutes until the mixture becomes thick, glossy, and tripled in volume. Add vanilla extract at the end.
5. Pour & Set
Spread the mixture into the prepared pan, smoothing the top with a spatula. Dust lightly with confectioners’ sugar. Let sit uncovered at room temperature for 6–8 hours or overnight.
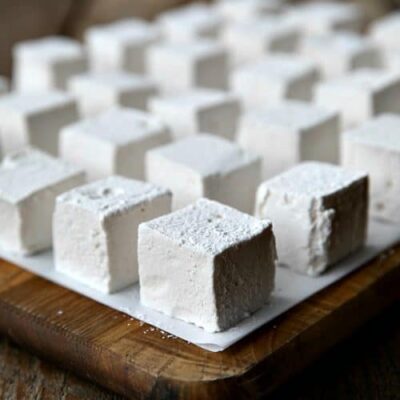
6. Cut & Coat
Once set, turn the marshmallow slab out onto a cutting board. Use a sharp knife or cookie cutters to cut into squares or shapes. Toss pieces in confectioners’ sugar to prevent sticking.
🌟 Creative Variations
Chocolate Marshmallows: Add cocoa powder to the sugar mixture or dip finished marshmallows in melted chocolate.
Peppermint Twist: Replace vanilla with peppermint extract—perfect for the holidays.
Colorful Marshmallows: Add food coloring during the whipping stage.
Fruit-Flavored Marshmallows: Use fruit extracts or puree for natural flavoring.
Gourmet Add-Ins: Swirl in caramel, crushed cookies, or sprinkles for fun textures.
🔑 Pro Tips for Success
Always use a candy thermometer—temperature is crucial.
Lightly oil your knife or cookie cutters for cleaner cuts.
Store marshmallows in an airtight container at room temperature for up to 2 weeks.
Don’t refrigerate—they may become sticky.
🍫 Best Ways to Enjoy Marshmallows
Toasted over a fire for classic s’mores.
Melted into hot cocoa with whipped cream.
Cut into tiny cubes as toppings for cupcakes.
Mixed into crispy rice treats or brownies.
Packaged in gift bags with ribbon for homemade presents.
✅ Conclusion
Whether you’re a beginner in the kitchen or a seasoned home baker, this ultimate marshmallow recipe guide makes it easy to create fluffy, irresistible marshmallows at home. Once you’ve tried the homemade version, you’ll never go back to store-bought again.
So, grab your sugar, whisk, and candy thermometer, and start whipping up your own batch of sweet, pillowy perfection today!