Golden, crispy, and bursting with flavor, the chimichanga is a Tex-Mex classic that has captured hearts across the United States, United Kingdom, and Canada. Often described as a deep-fried burrito, the chimichanga is indulgent comfort food at its finest. With its crunchy exterior and savory filling, it’s the kind of dish that transforms an ordinary dinner into a fiesta.
In this guide, you’ll learn how to master the art of chimichanga recipe today—from choosing the right tortillas to perfecting the frying technique, plus creative fillings and healthier alternatives.
H2: What Is a Chimichanga?
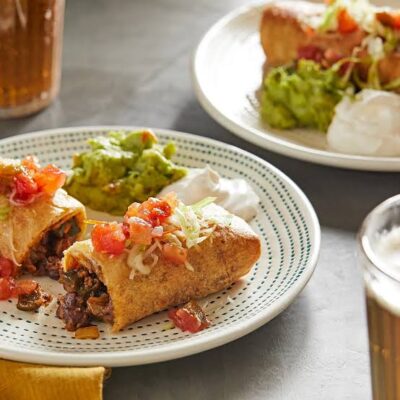
The chimichanga is believed to have originated in the American Southwest, where Mexican flavors meet American cooking styles. It’s essentially a burrito that has been folded, sealed, and deep-fried to perfection. The result? A dish that’s crunchy on the outside, warm and flavorful on the inside, and often topped with salsa, sour cream, or guacamole.
H2: Ingredients You’ll Need
To master the art of chimichanga recipe today, start with these essentials:
Large flour tortillas (10–12 inch)
Protein of choice: shredded chicken, beef, pork, or beans for a vegetarian option
Cooked rice
Refried beans or whole beans
Cheese: cheddar, Monterey Jack, or a blend
Salsa or pico de gallo
Spices: cumin, chili powder, garlic powder, salt, and pepper
Oil for frying (vegetable or canola)
Optional toppings: sour cream, guacamole, shredded lettuce, and hot sauce.
H2: Step-by-Step Chimichanga Recipe
H3: 1. Prepare the Filling
Sauté your protein with onions, garlic, and spices until flavorful.
Mix in cooked rice, beans, salsa, and cheese.
The filling should be hearty but not too wet—excess moisture makes frying tricky.
H3: 2. Assemble the Chimichanga
Warm tortillas slightly to make them pliable.
Spoon filling into the center, fold in the sides, then roll tightly like a burrito.
Secure with toothpicks if needed.
H3: 3. Fry to Perfection
Heat oil in a deep skillet (about 350°F / 175°C).
Carefully place the chimichangas seam-side down.
Fry until golden brown and crispy, turning once. This takes about 3–4 minutes per side.
Drain on paper towels.
H3: 4. Serve and Enjoy
Top with sour cream, guacamole, shredded lettuce, and extra salsa. Serve hot and crispy!
H2: Variations to Try
Baked Chimichanga: Brush with oil and bake at 400°F (200°C) for 20 minutes for a lighter option.
Seafood Chimichanga: Shrimp or crab filling with spicy cream sauce.
Vegetarian Chimichanga: Swap meat for beans, roasted vegetables, and extra cheese.
Breakfast Chimichanga: Eggs, sausage, potatoes, and cheese make it a morning feast.
H2: Pro Tips for the Perfect Chimichanga
Don’t Overfill: Too much filling makes rolling and frying messy.
Seal Properly: Fold tightly to avoid leakage during frying.
Use the Right Oil Temperature: Too cool, and the tortilla absorbs oil; too hot, and it burns quickly.
Serve Immediately: Chimichangas are best eaten fresh and crispy.
Customize Your Toppings: Fresh garnishes elevate the flavor and balance the richness.
H2: What to Serve with Chimichangas
Mexican Rice
Refried Beans
Corn Salad
Tortilla Chips with Salsa or Queso
Fresh Margaritas or Agua Fresca
Conclusion
When you master the art of chimichanga recipe today, you’ll realize this dish is more than just fried food—it’s a celebration of flavor, texture, and creativity. With endless filling options, customizable toppings, and the choice to fry or bake, chimichangas can fit any occasion, from a casual weeknight dinner to a festive gathering.
So grab your tortillas, fire up the skillet, and bring the taste of Tex-Mex comfort right into your kitchen. 🌮✨