There’s nothing quite like the joy of creating your own play dough at home. Not only is it an inexpensive and fun activity for kids, but it’s also a wonderful way to spark creativity, improve fine motor skills, and keep little hands busy. Store-bought options are convenient, but making play dough from scratch is surprisingly simple—and much more satisfying. That’s why today we’re going to share a Quick & Delicious Play Dough Recipe You Must Try!
This recipe uses basic kitchen ingredients, can be whipped up in just minutes, and provides a soft, pliable, and long-lasting dough. Whether you’re a parent, teacher, or caregiver in the United States, United Kingdom, or Canada, this guide will walk you through everything you need to know—from the recipe itself to storage tips and creative play ideas.
Why Make Homemade Play Dough?
Before we dive into the actual recipe, let’s answer the big question: why make your own play dough when you can just buy it?
Cost-effective: You likely already have most of the ingredients at home.
Safe and non-toxic: You control what goes in, making it safer for young children.
Customizable: Choose your own colors, scents, and textures.
Fun bonding activity: Involving kids in the process adds to the play experience.
Most importantly, the Quick & Delicious Play Dough Recipe You Must Try! ensures soft, smooth dough that’s easy to mold and doesn’t dry out quickly.
Ingredients for the Quick & Delicious Play Dough Recipe You Must Try!
Here’s the simple ingredient list you’ll need:
2 cups all-purpose flour
¾ cup salt
2 tablespoons cream of tartar (for elasticity and longer shelf life)
2 cups water
2 tablespoons vegetable oil (or coconut oil for a softer feel)
Food coloring (gel or liquid)
Optional: a few drops of flavor extracts (vanilla, peppermint, or lemon) for a fun scent
Most kitchens already have these staples on hand, making this recipe both quick and convenient.
Step-by-Step Instructions
Step 1: Mix Dry Ingredients
In a large mixing bowl, combine the flour, salt, and cream of tartar. This forms the base of your play dough.
Step 2: Add Wet Ingredients
Stir in water and vegetable oil. Mix until it begins to form a smooth batter-like consistency.
Step 3: Cook the Mixture
Pour the mixture into a large saucepan. Cook over medium heat, stirring constantly. Within a few minutes, the mixture will start to thicken. Continue stirring until it forms a sticky ball that pulls away from the sides of the pan.
Step 4: Add Color and Scent
Remove the dough from the pan and let it cool slightly. Divide into portions if you want multiple colors. Knead in food coloring and optional extracts. The kneading process not only distributes color evenly but also gives the dough its soft, pliable texture.
Step 5: Store Properly
Place the finished play dough in airtight containers or zip-seal bags. If stored correctly, it can last for several weeks.
And there you have it—the Quick & Delicious Play Dough Recipe You Must Try! in just five easy steps.
Creative Variations to Try
One of the best things about making your own play dough is experimenting with different variations. Here are some fun ideas:
Scented Play Dough
Citrus Zest: Add lemon or orange extract for a refreshing aroma.
Peppermint: Perfect for winter crafts.
Vanilla or Almond Extract: Adds a bakery-inspired scent.
Glitter Play Dough
Mix in fine craft glitter for a sparkly effect. Kids love watching it shine as they mold shapes.
Textured Play Dough
Incorporate rice, sand, or beads for an interesting sensory experience.
Edible Play Dough (for younger children)
Use natural food coloring and flavor extracts so it’s safe if accidentally tasted. While not meant for snacking, this version is non-toxic.
Practical Tips for the Best Results
To make sure your Quick & Delicious Play Dough Recipe You Must Try! turns out perfect every time, keep these tips in mind:
Consistency check: If dough feels sticky, add a tablespoon of flour. If it’s too dry, knead in a teaspoon of oil.
Even coloring: Use gel-based food coloring for vibrant, long-lasting colors without making the dough watery.
Storage solutions: Store in airtight jars or resealable bags. Refrigeration can extend shelf life.
Involve kids in kneading: This is the most fun part, and it builds hand strength and coordination.
Label your batches: Especially useful if you make multiple colors or scents.
Benefits of Play Dough for Children
Play dough is more than just fun—it’s educational. When children engage with it, they’re developing important skills:
Fine motor skills: Rolling, squishing, and shaping strengthens small hand muscles.
Creativity and imagination: Kids can make anything from animals to pretend food.
Stress relief: The tactile experience has a calming effect, even for adults.
Cognitive development: Introducing colors, shapes, and textures enhances learning.
That’s why the Quick & Delicious Play Dough Recipe You Must Try! isn’t just about fun—it’s a tool for growth and development.
Common Mistakes to Avoid
Even with a simple recipe, a few missteps can affect your play dough quality. Here’s what to watch out for:
Skipping cream of tartar: This ingredient is key for elasticity and longevity.
Overcooking: This can make the dough too dry or crumbly. Remove from heat once it clumps together.
Adding color too late: While kneading works, adding color to water first creates a more even tone.
Poor storage: Leaving dough exposed to air will dry it out quickly.
By avoiding these mistakes, your homemade dough will stay soft and usable for weeks.
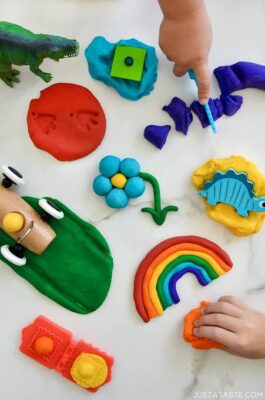
Fun Play Ideas with Homemade Play Dough
Once you’ve made your batch, the fun really begins. Here are some activities kids will love:
Cookie cutters and rolling pins: Create shapes and patterns.
Alphabet learning: Form letters and spell out names.
Play kitchen fun: Pretend to make pizzas, cakes, or sandwiches.
Stamping: Use toys, leaves, or textured objects to imprint designs.
Seasonal crafts: Pumpkins for Halloween, hearts for Valentine’s Day, or stars for Christmas.
The possibilities are endless, which is why having a reliable Quick & Delicious Play Dough Recipe You Must Try! is such a game-changer for family fun.
Storing & Reviving Play Dough
To maximize the life of your homemade play dough:
Store in an airtight container at room temperature.
If it starts to dry, knead in a drop or two of oil or warm water.
If it becomes sticky, add a dusting of flour.
Properly stored, most batches will last 2–4 weeks, sometimes longer.
Conclusion
Making play dough at home doesn’t have to be complicated. With just a few pantry staples, you can create a colorful, soft, and safe dough that will entertain children for hours. More than a toy, it’s a creative and educational tool that supports development while sparking imagination.
By following this Quick & Delicious Play Dough Recipe You Must Try!, you’ll not only save money but also create lasting memories. Whether you want a rainy-day activity, a classroom project, or simply a way to keep little hands busy, homemade play dough is the perfect solution.
So gather your ingredients, roll up your sleeves, and start mixing—fun, learning, and creativity await!